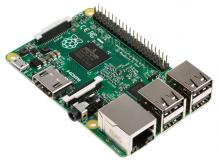
Raspberry Pi is a compact computer that plugs into a monitor and can use a mouse and keyboard. Prior knowledge must be obtained before attempting to work with a Raspberry Pi, but documentation can be found online.
Necessary Items (not provided)
- The user must come ready with a micro-sd card.
- The micro-SD card must also have installed one of the various operating systems the can run on a Raspberry Pi. There are many guides online as to how to do this and instruction for formatted the SD card can be different between operating systems. Here’s a link to the official guide: https://www.raspberrypi.org/documentation/installation/installing-images/
- After that, you need a screen that can support an HDMI cable. A converter to HDMI should work just as well.
- A mouse and a keyboard will also be needed
- A wall outlet to use with the power source will also be needed.
How to Turn On the Raspberry Pi
- The user must first insert the micro-SD into the underside slot on the Raspberry pi.
- Once the Micro-SD is locked into place, attach the HDMI cable to the board and screen.
- Then attach the keyboard and mouse into any of USB slots found on the Raspberry pi.
- Finally plug in your power source to the appropriate slot on the Raspberry Pi and plug the other end into the wall
- The operating system should start right away and the board can begin to be programmed.
Loan Period:
3 days
You can check this out from:
1st floor Circulation Desk
Lost/Damaged Equipment Fee:
$87.00